


Today, I’m excited to share a special project with you all – the “Cozy Linked Cropped Cardigan.” This piece is a culmination of my love for crochet and a quest to find the perfect stitch that’s not only quick to work up but also elegantly solid. After much experimentation, the linked double crochet stitch emerged as the clear winner.


Why You’ll Love This Cardigan
- Unique Stitch for a Unique Look: The linked double crochet provides a beautiful, dense fabric, which means no more gaps like in traditional crochet stitches. It’s ideal for those looking for a bit more texture and substance in their garments.
- Fashion-Forward Design: Featuring a high, wide collar and ribbing that’s longer than usual on the waist and cuffs, this cardigan is designed to be a standout piece in your wardrobe.
- Customizable for All Body Types: The pattern includes sizes from XS to 2XL. The design is such that it allows you to easily adjust the length of both the body and sleeves to suit your style and fit preferences.
Materials You’ll Need
- Yarn Choices: I opted for Metallico Hobbii Fine and Drops Loves You 7. These yarns are not just about the color and texture; they bring life and character to the stitches, enhancing the overall look of the cardigan.
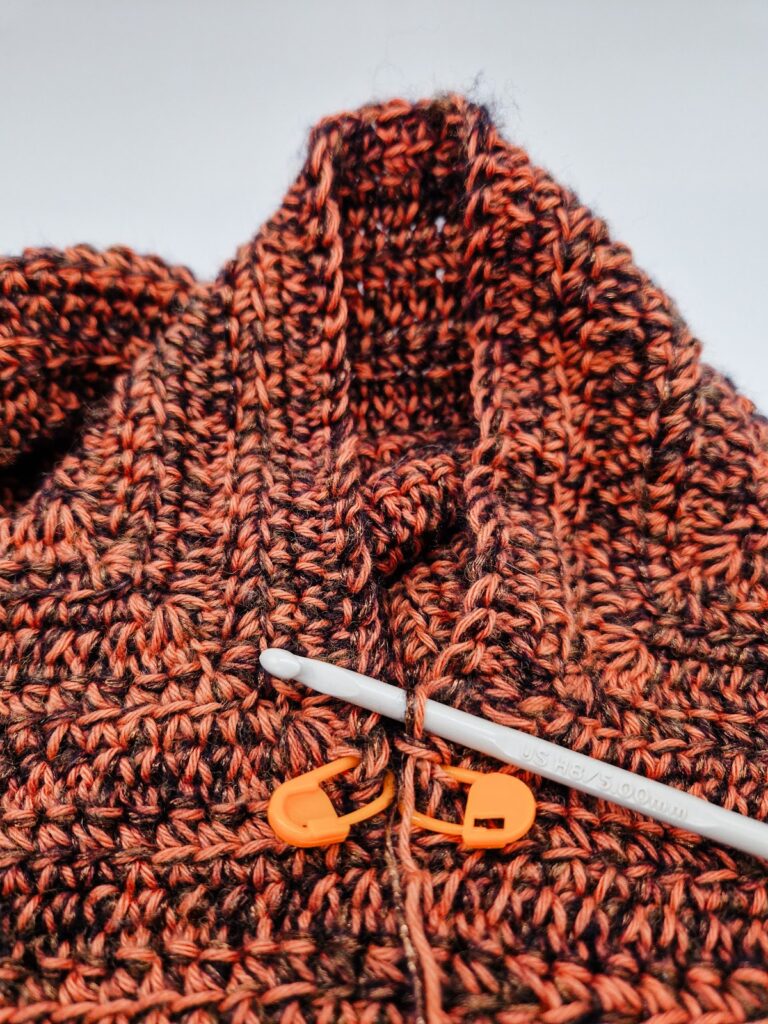
- Hooks for the Perfect Stitch: Depending on your gauge, you’ll need 3.5, 4, and 5 mm hooks. This range allows for adjustments, ensuring the stitches are just right.
- Essential Accessories: Besides the usual yarn needle and scissors, don’t forget the measuring tape and stitch markers. They are crucial for keeping your work consistent.


Pattern Highlights
- Gauge Matters: I can’t stress enough the importance of gauge in this project. The right gauge ensures the cardigan fits beautifully.
- Extended Ribbing for Extra Comfort: The ribbing at the waist and cuffs isn’t just an aesthetic feature; it adds to the comfort, ensuring the cardigan sits snugly.
- Raglan Design for Easy Fitting: The top-down approach is fantastic for trying on the cardigan as you go, making sure it fits perfectly at every stage.
Special Technique: Linked Double Crochet Stitch
- The linked double crochet is a game-changer in terms of creating a fabric that is dense and structured yet remains flexible and comfortable.
Pattern Notes
- This pattern is a joy to work on, starting from the neck and flowing down in a seamless fashion.
- The cardigan is designed for a cropped look, but I’ve included guidelines to easily alter the length as per your preference.
Free Pattern and Tutorial
- As a token of my appreciation for the crochet community, I’m offering the pattern for size S for free right here on my blog.
- To accompany the pattern, I’ve prepared a comprehensive YouTube tutorial that breaks down each step, making the process as clear and enjoyable as possible.
Crochet is more than just a hobby; it’s an expression of creativity and personal style. The Cozy Linked Cropped Cardigan is a testament to that, and I hope it brings as much joy to your crochet journey as it has to mine.
Feel free to share your progress, ask questions, or just share your experience. Your feedback and creations inspire me every day.
Happy Crocheting,
Karmen
Materials
- Yarn:
A: Metallico Hobbii Fine, 70% polyamide, 20% acrylic, 10% merino wool, color 14
- Size S: 300 g / 1590 m
B: Drops Loves You 7, 100% cotton, classic 8/4 cotton, 5 ply, sport, color 34
- Size S: 300 g / 1020 m
- Hook: 3.5, 4 and 5 mm
- Button 2.5 cm, magnetic snap button 1 cm
- Yarn Needle, Scissors, Measuring Tape, Stitch Markers
Gauge
Body and sleeves
15 ldc sts = 10 cm
8.5 ldc rows = 10 cm
Working with one strand of yarn A and one strand of yarn B.
Ribbing
11 fpdc, bpdc sts = 10 cm
7,5 fpdc, bpdc rows = 10 cm
Working with two strands of yarn A.
Stitch Key (US terminology)
- ch = chain
- yo = yarn over
- st = stitch
- sts = stitches
- slst = slip stitch
- slsts = slip stitches
- sc = single crochet
- sc3tog = single crochet three stitches together
- fpdc = front post double crochet
- bpdc = back post double crochet
- fpdc 2 = front post double crochet in next two stitches
- fpdc 6 = front post double crochet in next six stitches
- fpdc2tog = front post double crochet two stitches together
- ldc = linked double crochet
- 2 ldc = two linked double crochet stitches in one stitch
- sp = space
- RS = right side
- WS = wrong side
- V stitch = 2 ldc, ch 1, 2 ldc
Specialty Stitch & Technique Key
Linked Double Crochet Stitch
1. Starting Chain: Begin with a foundation chain of any number of stitches.
2. First Stitch Setup: To start the first linked double crochet (ldc) of the row, yarn over and insert your hook into the 2nd chain from the hook. Yarn over and pull up a loop (3 loops on hook). This step links the stitches at the base.
3. Complete the First Stitch: Yarn over and pull through 2 loops (2 loops remain on hook). Yarn over again and pull through the remaining 2 loops. This completes your first ldc.
4. Subsequent Stitches: For the next and all following ldc stitches, instead of yarning over to start the stitch, insert your hook into the horizontal bar of the previous ldc (it’s located just below the top two loops of the stitch). Yarn over and pull up a loop. Then, insert your hook into the next stitch of the foundation chain (or the next stitch of the previous row in subsequent rows), yarn over and pull up a loop (3 loops on hook).
5. Complete the Stitch: Yarn over and pull through 2 loops (2 loops remain on hook). Yarn over again and pull through the remaining 2 loops. This completes your linked double crochet stitch.
6. Continue Across: Repeat step 4 and 5 across the row.
7. Turning: At the end of the row, chain 2 (this counts as the first ldc of the next row) and turn your work.
8. Starting Next Row: Insert your hook into the second chain from the hook (the bottom chain of the turning chain), yarn over and pull up a loop. Then, insert your hook into the first stitch of the row, yarn over and pull up a loop, and complete the stitch as before.
9. Repeat: Continue with the linked double crochet stitches as established, working into the horizontal bars of the previous stitches and the next stitch on the row.
This stitch creates a denser and less holey fabric compared to regular double crochet, making it ideal for projects where a firmer texture is desired.
Notes
- Ch 2 doesn’t count as a stitch unless it says otherwise.
- Ch 1 in the V stitch does not count as a stitch for stitch count.
- You will start working around the neck (it’s a raglan style cardigan, one piece, no sewing), leaving the holes for the sleeves/armholes, working on the body and finishing with the sleeves.
- The pattern is designed for a cropped length, but you can easily extend it by following the guidelines in the ‘Body’ section.
Instructions
Collar
Work holding one strand of yarn A and one strand of yarn B here and across unless it says otherwise.
Ch 74
Row 1: ldc across.
Row 2 – 9: ch 2, turn. Ldc across.
Yoke
With stitch markers mark stitches for corners:
1st st marker goes in 16th st (front),
2nd st marker goes in 4th st from the 1st st marker (sleeve),
3rd st marker goes in 32nd st from the 2nd st marker (back),
4th st marker goes in 4th st from the 3rd st marker (sleeve),
you have 16 sts left (front).
Row 10: ch 2, turn. *Ldc until you reach the st marker, (2 ldc, ch 1, 2 ldc) in the st with the st marker* repeat across. After finishing the corner (2 ldc, ch 1, 2 ldc) place the stitch marker in the ch 1 sp.
Repeat row 10 until row 21.
Separating body and sleeves
Row 22: ch 2, turn. Ldc until you reach the 1st ch 1 sp (the 1st st marker). Ldc in the 3rd ldc of the V stitch on the other side of the sleeve and across until you reach the 3rd st marker. Ldc in the 3rd ldc of the V stitch on the other side of the sleeve and across until the end of the row.
Body
Row 23: ch 2, turn. Ldc across.
Repeat row 23 until row 35. Odd numbered rows are the wrong side and even numbered rows are the right side.
Tip: After the last row you will start with the waist ribbing that’s 12 cm long. You can adjust the length of the body here, if needed.
Waist
Work with a 4 mm hook and two strands of yarn A.


Row 1: ch 2, turn (ch 2 counts as a stitch here and across). Fpdc in the next st, *fpdc2tog, fpdc 2*, repeat from * to the end of the row. The last fpdc2tog will be worked in the st and in the 2nd ch from the ch 2 from the previous row.
Row 2: ch 2, turn. *Fpdc, bpdc* across. Dc in the 2nd ch from the ch 2 from the previous row.Tip for row 2:
When starting row 2, be careful not to work into the very last stitch from the previous row (fpdc2tog). Instead, begin your first front post double crochet (fpdc) in the second stitch of the new row.
It’s important to pay close attention when working on the fpdc2tog stitches from the previous row. These can easily be mistaken for a regular fpdc stitch. To avoid confusion and ensure your pattern is correct, remember to clearly identify and distinguish the fpdc2tog stitches from ordinary fpdc stitches.
Repeat row 2 until row 12.
Finish off.
Sleeves
You will be working with one strand of yarn A, one strand of yarn B and with a 5 mm hook in joined rounds.
It’s important you start working on the right side for size S.
Round 1: attach the yarn in the ch 1 sp of the V stitch on the right side of the sleeve and ch 1:

Work sc3tog in the ch 1 sp, the side of the ldc row from separating body and sleeves and the ch 1 sp on the other side:
Work dc in the next st and then ldc around and join with a sl st.
Round 2 – 27: ch 2, turn. Ldc around, join with a sl st.
Tip: After the last round you will start with the cuff that’s 12 cm long. You can adjust the length of the sleeve here, if needed.
Finish off.
Cuff
Work with 2 strands of yarn A and a 4 mm hook.
Round 1: ch 2, turn (ch 2 counts as a stitch here and across). Fpdc in the next st, *fpdc2tog, fpdc 2*, repeat from * to the end of the round. Slst to join.
Round 2: ch 2, turn. *Fpdc, bpdc* across. At the end of the round work bpdc in the last st and ch 2 as if they are one st. Sl st to join.
Repeat round 2 until round 12.
Finish off.
Repeat the instructions for the other sleeve.
Placket
Placket is worked with a 3.5 hook. Because the hook is smaller, you will work *2 sc sts in 1st 2 rows and 3 sc sts in the next row* on the body and 2 sc sts in each row on the waist ribbing.
Right side


RS facing, attach the yarn in the bottom corner on the right side of the placket:
Row 1: ch 1, sc evenly across.
Row 2 and 3: ch 1, turn. Sc across.
Holes for buttons:
Row 4: ch 1, turn. Sc in next 3 sts, ch 4, sk 4, *sc in next 15 sts, ch 4, sk 4* repeat 4 more times, sc in the remaining 3 sts.
Tip: Feel free to modify the number of buttons as per your requirement, and also adjust the size of the buttonholes accordingly.
Row 5: ch 1, turn. Sc across.
Repeat row 5 until row 7.
Do not finish off here!
Collar edge: work 2 more sc in the last st of row 7. Sc across until you reach the left side of the placket. Work 2 sc in the last st on the collar edge.
Left side
Row 1: sc evenly across.
Row 2: ch 1, turn. Sc across.
Repeat row 2 until row 7.
Finish off.
Sew on the buttons and your cardigan is ready to wear.


0 Comments