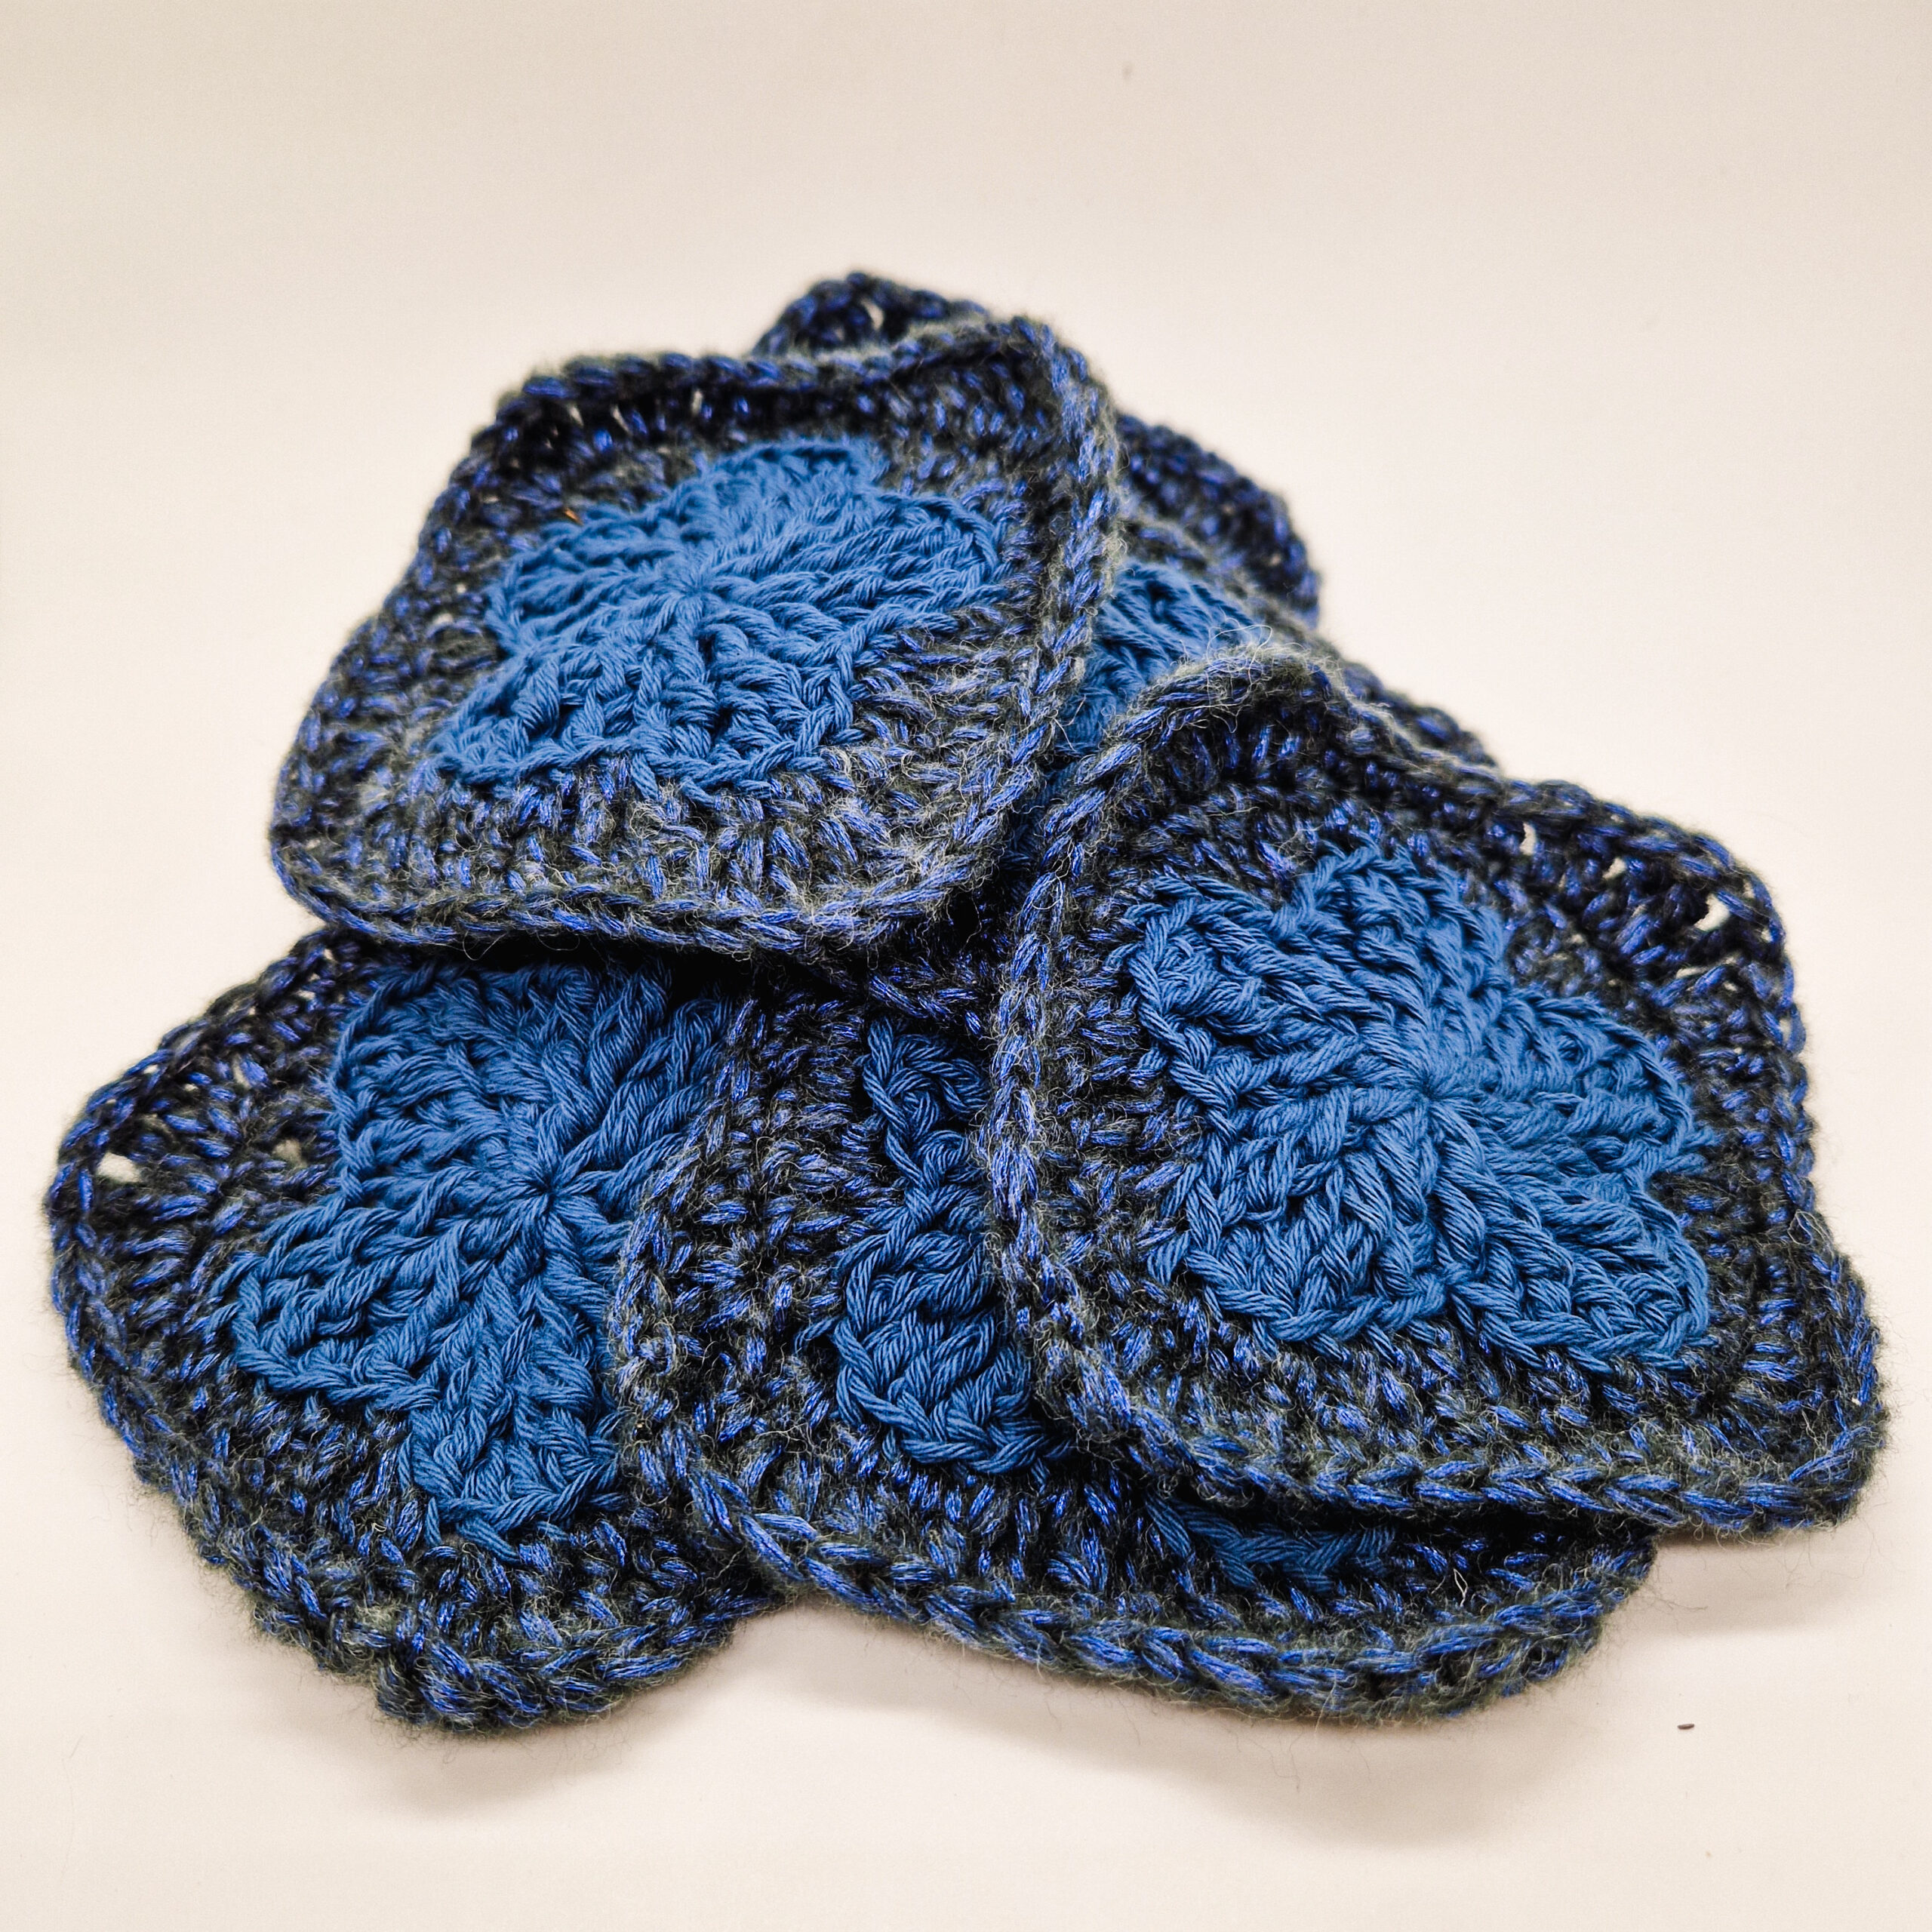
Greetings to all crochet enthusiasts and yarn lovers! Today, I bring to you a delightful crochet pattern – the Flower Granny Square. Featuring unique stitches and intricate design elements, this granny square exudes elegance and style.
Whether you’re looking to craft a beautiful afghan or incorporate these into a larger project, these squares are sure to steal the show. And if you’re a visual learner, don’t worry – I’ve got you covered with a step-by-step YouTube tutorial to guide you through each and every stitch.
Materials Needed:
- YARN:
- Yarn A: Metallico Hobbii (70% polyamide, 20% acrylic, 10% merino wool). 50g (1.75 oz), 265 m (289 yds). Recommended hook size: 3-3.5 mm. Color: 8 – A shimmery black/dark blue.
- Yarn B: DROPS LOVES YOU 7 (100% cotton, classic 8/4 cotton). 50 g (1.8 oz), 170 m (185 yds). Recommended hook size: 3.5 mm. Color: 28 – Dark blue.
- Hook: 5 mm
- Additional tools: Yarn Needle, Scissors, Measuring Tape, Stitch Markers
Stitch Key (US terminology):
- ch = chain
- st = stitch
- sts = stitches
- slst = slip stitch
- slsts = slip stitches
- fpslst = front post slip stitch
- sc = single crochet
- sc 3 = single crochet in next three stitches
- hdc = half double crochet
- hdc 3 = half double crochet in next three stitches
- hdcblo = half double crochet back loop only
- dc = double crochet
- fpdc = front post double crochet
- 2 fpdc = two front post double crochet stitches in one stitch
- fpdc 2 = front post double crochet in next two stitches
- edc = extended double crochet
- edcblo = extended double crochet back loop only
- fptc = front post treble crochet
- tcblo = treble crochet back loop only
- 3 fptc = three front post treble crochet stitches in the next stitch
- MR = magic ring
Specialty Stitch & Technique Key:
Invisible join
Pull the loop on the hook a little longer, remove the loop from the hook, insert the hook in the 2nd st from the back, take the loop through that st. Now continue on to the next round.
Notes:
- Ch 2 doesn’t count as a stitch unless mentioned otherwise.
- Granny squares are worked in joined rounds with an invisible join.
- If any part of the pattern feels tricky, I strongly recommend referring to the YouTube tutorial
Instructions:
Starting with Yarn B:
Round 1: Begin with a magic ring. Ch 2, then work 10 dc into the MR. Complete the round using an invisible join.
Round 2: Start with ch 2. Now, make 2 fpdc in the 1st stitch and continue around. Complete the round with a fpslst in the 1st stitch of this round and move on to the next stitch for round 3.
Petals:
Round 3: *[fpdc, fptc] in the next st, 3 fptc in the next st, [fptc, fpdc] in the next st, fpslst in the next st* repeat 4 more times. The last slst will be in the 1st slst of the round.
Finish off.
Transition to Yarn A for the Border:
Attach Yarn A in the 1st Fptc (from the group of 3 fptc) but ensure it’s only in the back loop. Continue as per the instructions provided.
Round 1: blo hdc in the same st and in the next 2 sts *(hdcblo 3), dcblo in the next st, edcblo, tcblo, edcblo, dcblo* repeat 4 more times. Join with invisible join in the 1st st of the round. (40)
Round 2: ch 4, tc in the same st, [edc, dc] in the next st, dc in the next st, hdc in the next st, sc 3, hdc in the next st, dc in the next st, [dc, edc] in the next st, *[tr, ch 1, tc], [edc, dc], dc, hdc, sc 3, hdc, dc, [dc, edc]* repeat 2 more times. Slst in ch 1 sp to join.
Finish off.
Voila! Your Flower Granny Square is now complete. It’s amazing what these stitches, when combined in a particular sequence, can bring to life. The blend of the two yarns, with their unique textures and colors, elevates the design, making it versatile for various projects.
For those who prefer a visual guide, my YouTube tutorial will walk you through the entire process. I always find that watching someone else can help iron out any doubts.
Happy crocheting! If you create your own Flower Granny Square, please share your creations with me. I’d love to see your interpretation and the projects you incorporate them into.


I can’t find where to find a pdf, even on the blob. I understood that today – only – the flower granny square will have a free pdf.
Thanks,
Hi! The pattern is free on the blog post. It’s on the bottom of the post, just scroll down. No pdf for this one. It’s gonna stay free.❤️